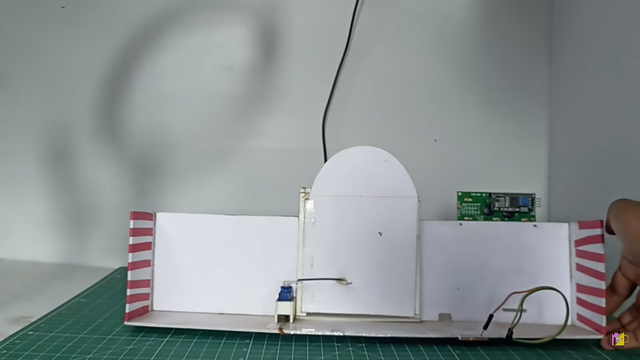
How to make a RFID based Door Unlocking System
Learn to make a RFID based Door unlocking system using Arduino, LCD, RFID and Servo
Description:
Creating an RFID controlled door using a servo motor and an I2C LCD with Arduino can be a fun and rewarding project. Here are the steps you can follow:
Step 1: Gather Materials
- Arduino Uno or compatible board
- RFID reader module (such as RC522)
- Servo motor
- I2C LCD display
- RFID tags/cards
- Jumper wires
- Breadboard
- Power source (battery or USB cable)
Step 2: Set up the Circuit
1. Connect the RFID reader module to your Arduino using jumper wires. Wire connections typically include:
- VCC to 3.3V or 5V on Arduino
- GND to GND on Arduino
- RST to digital pin on Arduino (e.g., pin 9)
- IRQ (if available) can be left unconnected
- MISO to digital pin 12
- MOSI to digital pin 11
- SCK to digital pin 13
- SDA to digital pin 10
2. Connect the servo motor to your Arduino:
- Connect the red wire to 5V on Arduino
- Connect the black wire to GND on Arduino
- Connect the signal wire (usually orange or yellow) to a digital pin on Arduino (e.g., pin 6)
3. Connect the I2C LCD display to your Arduino:
- Connect the VCC pin to 5V on Arduino
- Connect the GND pin to GND on Arduino
- Connect the SDA pin to the A4 (SDA) pin on Arduino
- Connect the SCL pin to the A5 (SCL) pin on Arduino
4. Power up your Arduino using a suitable power source.
Step 3: Install Required Libraries
- Download and install the necessary libraries for the RFID reader module, servo motor, and I2C LCD display. You can find these libraries in the Arduino IDE Library Manager or download them from trusted sources online.
Step 4: Write the Arduino Code
- Write the Arduino code to control the RFID reader, servo motor, and LCD display. Here’s a basic outline of what the code should do:
1. Initialize the RFID reader module and LCD display.
2. Define the servo motor pin and create a servo object.
3. Set up functions to read RFID tags/cards and compare them with authorized tags.
4. If an authorized tag is detected, unlock the door by rotating the servo motor.
5. Display appropriate messages on the LCD display to provide feedback to the user.
Step 5: Test the System
- Upload the Arduino code to your Arduino board.
- Test the RFID controlled door system by swiping authorized RFID tags/cards and observing the behavior of the servo motor and LCD display.
Step 6: Install and Secure Components
- Install the servo motor mechanism on your door to actuate the locking mechanism.
- Mount the RFID reader module and LCD display in a suitable location near the door.
- Secure all components and wiring to prevent damage or tampering.
Project Gallery
Video Tutorial :
Conclusion :
By following these steps, you can create your own RFID controlled door using a servo motor and I2C LCD with Arduino. Have fun experimenting and customizing your project! Also Check our website for more projects and explore Skill-Hub by EmbeddedBrew to enhance your Skills.


