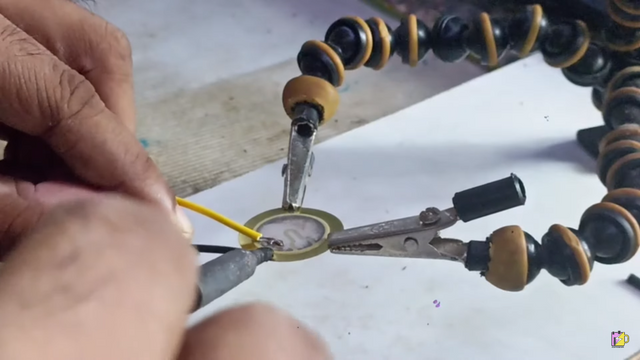
Getting Started with a Piezoelectric Disc and Arduino
This blog post provides a step-by-step guide to getting started with a piezoelectric disc and Arduino, making it easy for beginners to follow and understand.
Description:
Are you ready to dive into the world of electronics with a simple yet fascinating project? In this guide, we'll show you how to use a piezoelectric disc with an Arduino. A piezoelectric disc can be used as a sensor to detect vibrations or as an actuator to produce sound. Let's get started!
Materials Needed:
- Arduino board (e.g., Arduino Uno)
- Piezoelectric disc
- Breadboard
- Jumper wires
- 1MΩ resistor (optional, for better signal quality)
Step 1: Understand the Piezoelectric Disc
A piezoelectric disc generates a small voltage when it experiences mechanical stress (like tapping or vibration). Conversely, applying a voltage to it can produce sound. In this project, we’ll use it as a sensor to detect vibrations.
Step 2: Connect the Piezoelectric Disc to the Arduino
1. Wiring Setup:
- Positive Lead (Red Wire): Connect the positive lead of the piezo disc to an analog input pin on the Arduino (e.g., A0).
- Negative Lead (Black Wire): Connect the negative lead to the ground (GND) on the Arduino.
2. Optional Resistor (for stability):
- Connect a 1MΩ resistor between the analog input pin (A0) and ground (GND). This helps to stabilize the signal from the piezo disc.
Here’s a simple wiring diagram:
Piezo Disc + ------ A0 (Analog Input)
Piezo Disc - ------ GND (Ground)
1MΩ resistor -----A0 to GND
Step 3: Test Your Setup
1. Upload the Code: Connect your Arduino to your computer and upload the code using the Arduino IDE.
2. Open Serial Monitor: Open the Serial Monitor (Tools > Serial Monitor) in the Arduino IDE.
3. Observe the Readings: Tap or gently knock near the piezo disc and observe the values printed in the Serial Monitor. Higher values indicate stronger vibrations.
Step 4: Explore and Experiment
Now that you have a basic setup, here are a few ideas to expand your project:
- Sound Alarm: Use the piezo disc to trigger an alarm or buzzer when vibrations exceed a certain threshold.
- Data Logging: Record the vibration data over time using an SD card module.
- Interactive Projects: Incorporate the piezo disc into interactive art or DIY musical instruments.
Project Gallery
Video Tutorial :
Conclusion :
Using a piezoelectric disc with an Arduino is a great way to get started with electronics and sensor projects. With just a few components, you can create a variety of applications. Explore more projects on our website and continue your learning journey with Skill-Hub by EmbeddedBrew, where you can develop more skills in embedded systems. Happy building!


